TLDR: One simple and fast template to create App Store screenshots for every iPhone size at once.
Click here to download the Merchbar App Store Screenshots Photoshop Template.
In the process of making Merchbar 2.0 we decided to throw out our old, dirty, nasty, gross, janked, multi-screenshot into action way of creating all of the different image sizes required by Apple and start over.
With Photoshop CC 2015, Photoshop finally received Artboard support. If you don’t know artboards, they are basically like separate documents all in the same document – you can view them all at once, share resources, styles and layer comps and a lot more. Just so happens they are also perfect for this task.
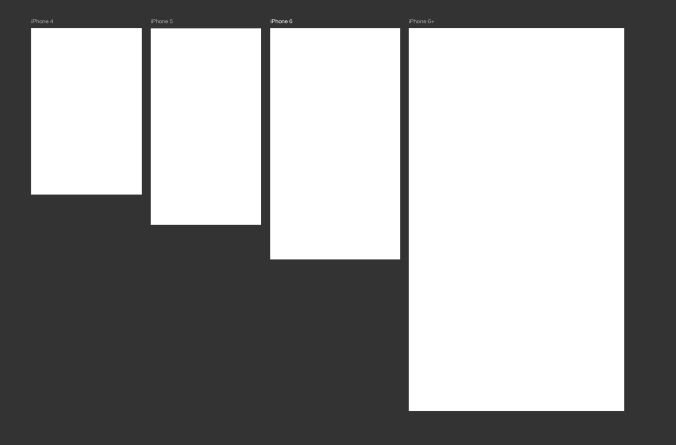
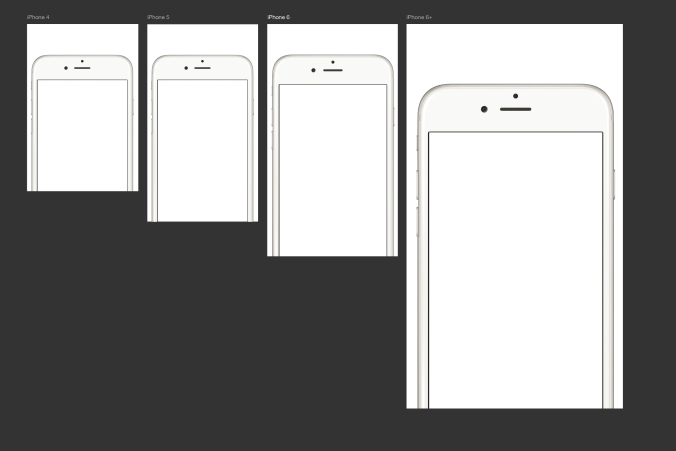
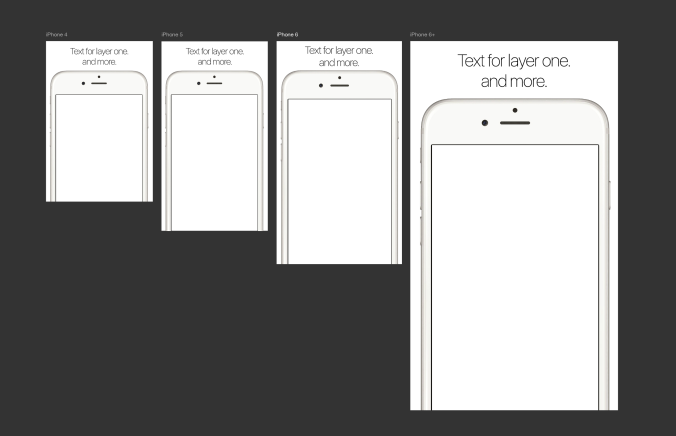
First we created the artboards we were going to need – one for each resolution of iPhone 4, iPhone 5, iPhone 6 and the big daddy – iPhone 6+.
Once we had our baseline we added in images of iPhones (you don’t have to do it this way, we just think they look better when you show the phone).
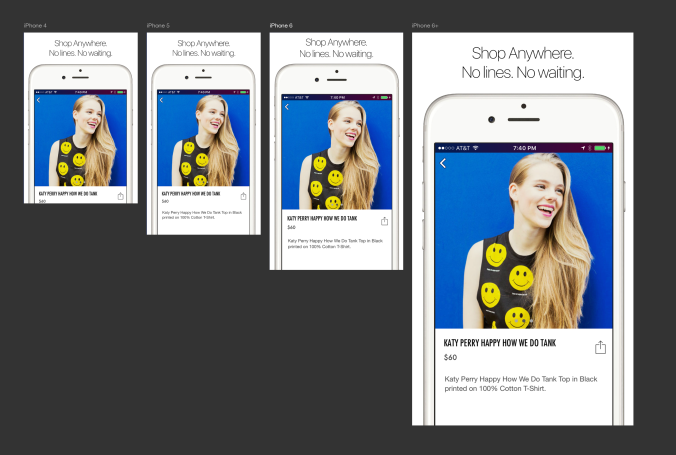
One thing you’ll notice is that we decided to use a 6+ for all the screenshots. Why would we do that?
Well, we originally laid out the document with the appropriate phone in each screen but as we got further along we realized even though the iPhone 4 is smaller than the 6+ it is proportionally larger so scaled down to fit our iPhone 4 screenshot size, the iPhone 6+ took up much less space than the iPhone 4.
We are huge fans of single sentences that describe your app in each screenshot so we left room for that descriptive text. But when we implemented the text we did two things to make it even easier…
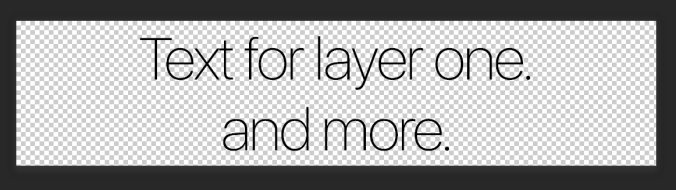
First, we used SmartObjects for each screenshot of text. When you edit one of the screens text, it will automatically update all of the other areas – and because it is text it will automatically be pixel perfect in every comp.
Here’s what the smart object looks like:
And here’s what it looks like with that same text across all 4 of the screens:
You’ll note we decided to go ultra-Apple and use the new San Francisco font family they recently released – specifically SF UI Display Thin.
We then made a different text layer smart object for each of the five screenshots. This way you can keep edits for each layer and update or change them individually.
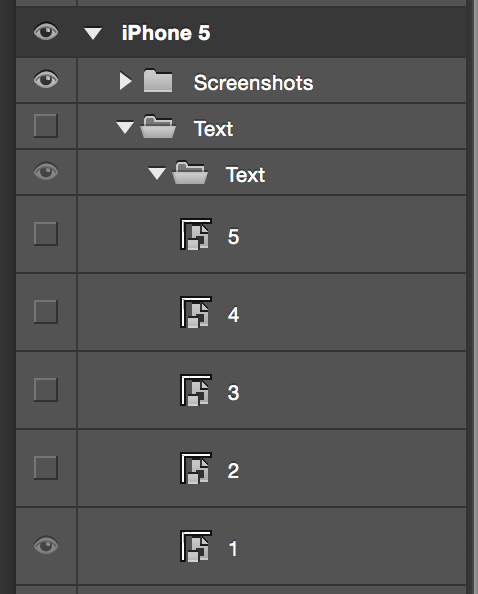
The other awesome thing this allows you to do is set up layer comps for each of the five screenshots you have. Layer comps allow you to save different states of visibility, position and layer styles so you don’t need to manually toggle every layer each time you want to change something.
So obviously we set up layer comps for each of the 5 different screens.
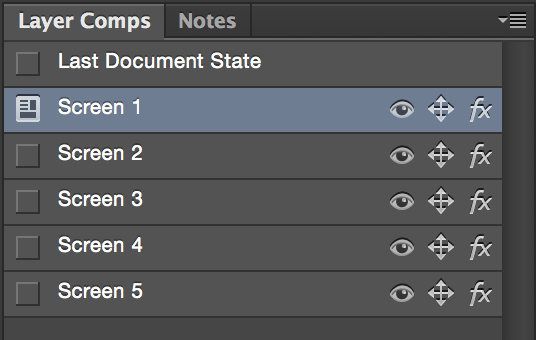
Going one step further, I’ve set up keyboard shortcuts to allow me to jump back and forth between layer comps so I can instantly move and compare how all the different states look next to each other. This only takes a couple of minutes to set up and works like a charm.
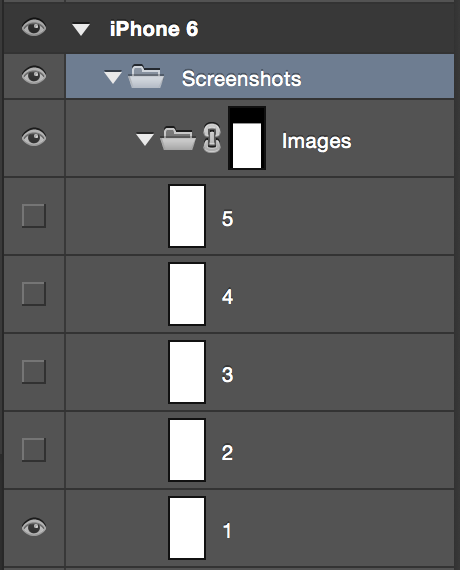
The final step of the process was to capture and place screenshots for each of the phones on each of the screens.
Originally we had planned to use smart objects for the screenshots as well – take 5 screenshots and apply them to each of the 4 different sizes. Unfortunately in practice this ends up looking pretty bad. Remember all the time you spent optimizing your layouts in X Code so they would look so snappy on all the different devices?
Turns out there was a reason and while we’ve saved a lot of time above, here we’re going to have to grind through and take screenshots on 3 different devices (iPhone 4 and iPhone 5 can both use the same since the iPhone 5 screen is only a tad longer and everything is at the same resolution).
The doc attached includes all of the right masking at the folder level so just drop your screenshots in the Screenshots > Images folder and they won’t creep over the sides of the phone.
One thing to note is you want the alignment of the images pixel perfect or as the user swipes through the different screens the images won’t line up. That’s bad.
If you are feeling super OCD you can ensure all of your screenshots show the same time. (Note: No one will ever see this unless you blog about it.)
From here on out, most of your time will be spent tweaking your content and images from an editorial perspective.
Once you have everything the way you like it…
Bad news.
Not terrible news, but bad news. For some reason Adobe dropped the ball here and instead of using our trusty friend Export > Layer Comps to Files we have to save each image individually.
For some crazy reason Adobe decided that Layer Comps to Files would export the entire project’s view of that layer comp instead of each artboard separately.
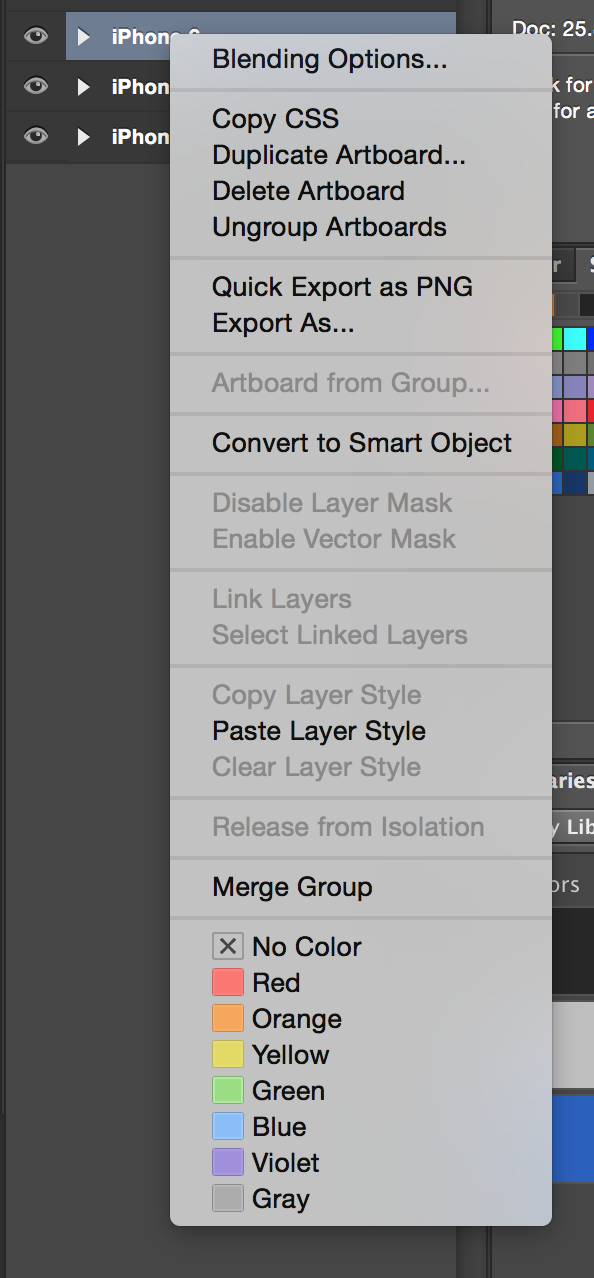
The good news is they did create a new Quick Export as PNG function that allows you to export each artboard as a PNG. So the process is to cycle through each layer comp and save each screen with a Quick Export.
To do this just right click on the folder containing your artboard and right click to pull up the Menu. Then click Quick Export to PNG.
 Honestly, it isnt terrible but it could be better.
As you save your files make sure to name them in such a way you’ll know what is what as you add them to iTunes Connect.
And that’s pretty much it. Make em look great!
Want to see how ours turned out? Check out check out Merchbar in the App Store here.
Want to work with the world’s most influential artists and the best fans? We’re hiring. Hit us up.
Apple App Screenshots Template with Layer Comps and Artboards
Features:
- Layer Comps for each Layer
- Smart Objects for all Text
- Masked iPhone’s to place your screenshots within
Click here to download.


You must be logged in to post a comment.